Description
Benefits
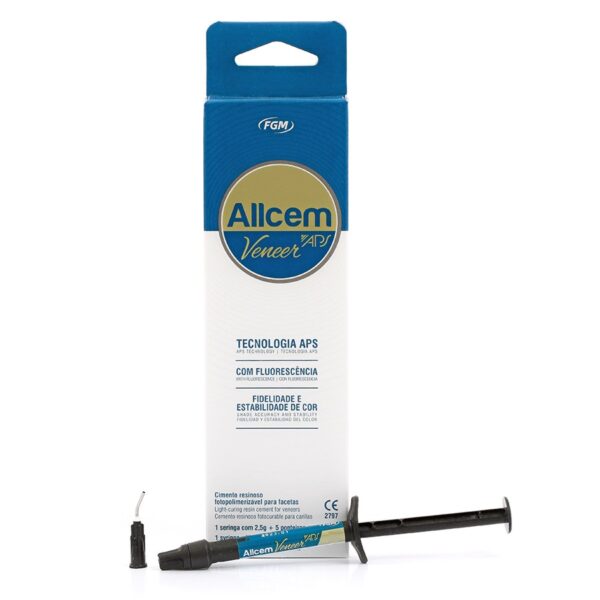
APS technology:
• Reduces or eliminates visual alteration of shade and opacity of the cement before/after photopolymerization.• Longer working time under ambient light.• Compatible with all blue light-emitting light-curing devices.
High shade stability:
Esthetic longevity.
Excellent viscosity:
Easy handling and application.
Radiopacity:
Possibilidade de diagnóstico radiográfico.
Fluorescência:
Possibility of radiographic diagnosis.
Fluorescence:
Appearance similar to the natural tooth.
Excellent mechanical properties:
Reliable and long-lasting cementation.
Recommendations
Adhesive of ceramic and composite restorations (made in the Office or in the laboratory) with a low layer thickness (up to 15 mm) that enables the use of a purely light-curing technique due to their high translucency.
Step by Step
- Tooth preparation: Make sure the tooth surface and the prosthetic piece are free from Allcem Veneer Try-In (FGM) and/or any other substances.
- Make a relative or absolute isolation according to the professional preference, and according to the teeth that will be subjected to cementation of the pieces.
- If the cervical finish line is under the gum, and your preference is to use relative isolation, perform the retracting maneuver with the retraction cords.
- Etch the enamel surface and/or dentin with phosphoric acid Condac 37 (FGM), wash and gently dry without dehydrating it.
- Etch the enamel surface and/or dentin with phosphoric acid Condac 37 (FGM), wash and gently dry without dehydrating it.
- Preparation of the piece. Etch the internal surface of the veneer with fluoride acid Condac Porcelana 10% (FGM), for the required time, according to the porcelain
- Apply a layer of silane Prosil (FGM) into the piece and let it dry for 1 minute.
- Apply the adhesive into the piece, according to the manufacturer’s recommendation. Do not light
- After preparing the piece and the tooth, perform the cementation as follows:
- Straight from the syringe, or using a spatula, apply a thin layer of cement under the internal face of the veneer.
- Position the piece in the preparation and, keeping it under slight pressure, remove excesses of cement using Cavi brush (FGM) or a probe.
- After removing the cement excesses, and prior to photo activation, apply glycerin gel to the borders of the restoration to avoid the layer inhibited by oxygen. The light curing should be performed for 40 seconds on each of the borders (mesial, distal and cervical) and directly on the vestibular face.*
- Finishing and polishing may be performed with thin sandpaper disks Diamond Pro (FGM) and sandpaper strips, polishing pastes Diamond Excel (FGM) and felt disks Diamond Flex (FGM).
- To photo activate the material, use halogen light devices or LED with power equal to or higher than 450mW/cm², and blue light issuing spectrum (400–500nm).


Reviews
There are no reviews yet.